How to fix rotten wooden steps on the stairs

29
March
Wooden steps on a staircase can be a beautiful addition to any home, providing a warm and classic aesthetic that adds character and charm. However, over time, wooden steps can rot due to exposure to moisture, making them not only unsightly but also a safety hazard.
If you have noticed that some of the wooden steps on your staircase are starting to rot, don’t worry, we’re here to help. This guide shows you step-by-step how to fix rotten wooden steps on the stairs with wood filler. Not only is it easy, it’s a lot cheaper than replacing them!
Step by step overview
- Clear and clean the rotted wooden step
- Apply DRY FIX® UNI and wait a minimum of 20 minutes
- Mix the DRY FLEX® 4 and apply with a modelling knife
- Once dry, sand, paint or varnish your wooden step
Tools and Materials
Tools: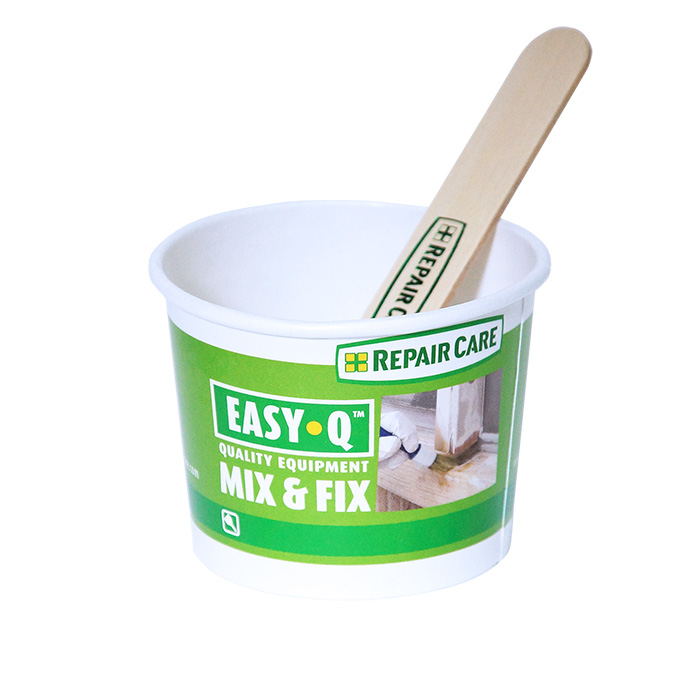
- Scraper or chisel
- Sandpaper (80-120 grit)
- Mixing board
- Mixing spatula
- Paintbrush or roller
- Gloves and eye protection
- Hammer and pry bar (optional – to remove nails and screws)
- Brush and vacuum (optional – to remove debris and dirt)
Materials: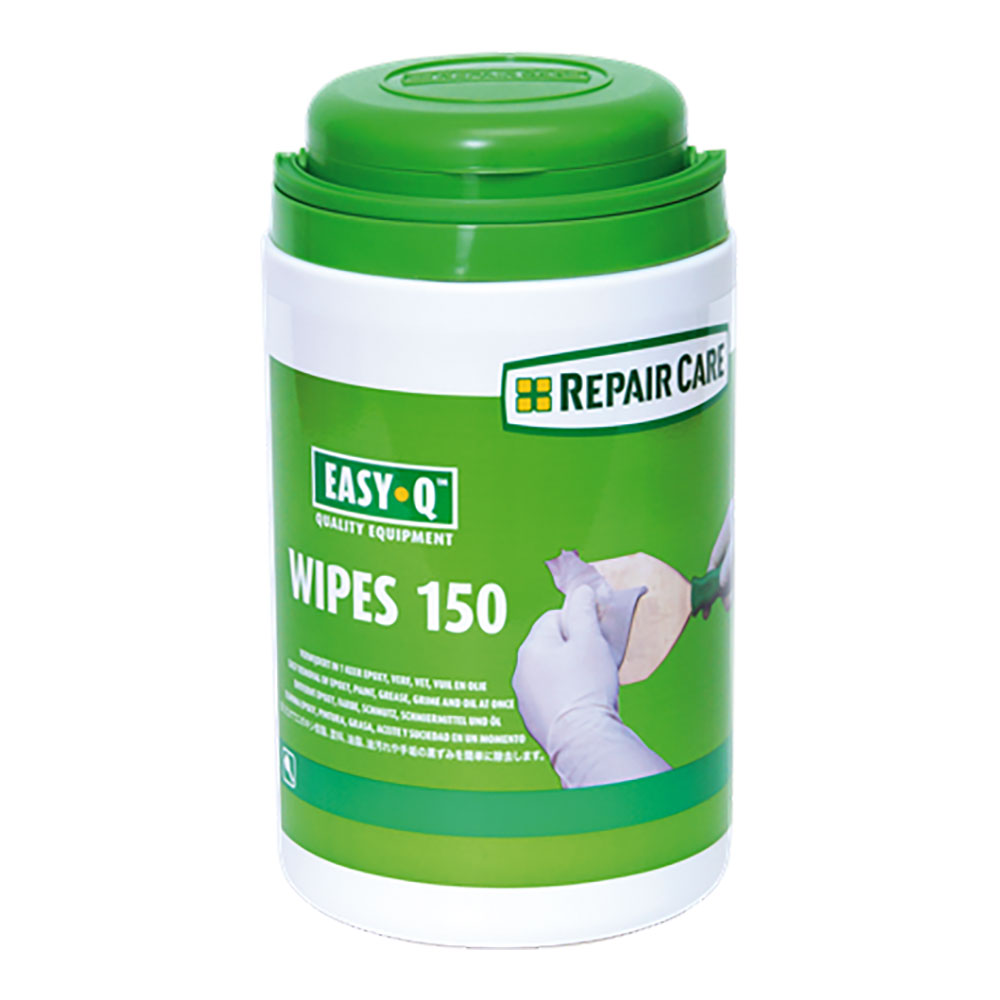
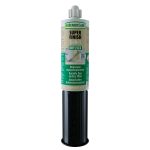
- DRY FLEX® 4
- DRY FIX® UNI
- Paint or stain (to match the surrounding area)
- EASY•Q™ Wipes (for cleaning tools)
- Rags or paper towels
- Masking tape (optional)
Preparation
Prefer watching a video? We’ve got you covered. Our tutorial covers the basics you need to fix a rotten wooden step.
1. Clear the area around the rotten wooden steps
Remove any loose or damaged wood using a scraper, chisel, or router. If necessary, use a hammer and pry bar to remove any nails or screws.
2. Clean the surface
Remove any debris, dirt or sawdust using a brush or vacuum. Wipe the surface with a rag or paper towel. Ensure it is completely clean and dry. Ensure moisture in the area of repair is below <18% using an EASY•Q™ moisture metre.
3. Sand the area with 80-120 grit sandpaper
This will help create a clean and smooth surface for the filler to adhere to. Be sure to sand in the direction of the wood grain.
 4. Apply DRY FIX® UNI
- Shake Component A.
- Pour Component A into an EASY•Q™ Mix and Fix set.
- Pour Component B
- Stir with EASY•Q™ spatula
- Apply the DRY FIX UNI to the rotten wooden step using a disposable brush
- Wait 20-25 minutes
- Remove all excess product after 20-45 minutes with absorbent paper
5. Use making tape to cover the surrounding area (optional)
This protects the rest of the step from the filler and paint.
Instructions
1. Mix the DRY FLEX® 4
Dispense the components on a mixing plate using our lightweight dosing gun. Mix both components together until a uniform colour is achieved.
Want to save time? Use our 2-in-1 solution for DRY FLEX® 4. Same qualities and can be used with a standard skeleton gun.
2. Apply the mixed DRY FLEX® 4 to the broken area of the wooden step using a mixing spatula or putty knife.
Be sure to fill in the area completely and level it off as much as possible.
3. Shape the DRY FLEX® 4 with a scraper to match the original shape of the wooden step.
Smooth out any rough edges or uneven areas.
4. Allow the wood filler to cure.
DRY FLEX® 4 takes around 4 hours to fully cure. Wait for it to become hard before moving to the next step.
5. Sand the repaired area using 80-120 grit sandpaper until it is smooth and level.
Remember to sand in the direction of the wood grain to avoid damaging the wood.
6. Paint or stain the repaired area with a paintbrush or roller.
Wait until the preservative or primer has dried before painting or staining. Once complete, allow for the area to dry completely before use.
Loved by painters and decorators across the UK
Painters and Decorators need a wood filler they can rely on. We made DRY FLEX® to cover every sort of job – from filling nail holes to repairing a window ledge others deemed unrestorable. Its durability protects against further damage and decay. Unlike other wood fillers, it doesn’t lift off or crack!
It’s cheaper to renew than replace – especially with DRY FLEX®.